
How to Add a Picture in Picture Video Overlay (2026 Guide)
The picture-in-picture button in Chrome or Safari floats a video into the corner of your screen. It looks exactly like the feature people mean when they go looking for a way to show two clips at once. It does nothing to your file. Close the tab and the floating window is gone, and the export is exactly what it was before.
What most people actually want is simpler: one clip shrunk into a corner of another inside the finished file. A webcam in the corner of a screen recording. A face-cam over gameplay. A translated speaker beside the original.
This guide shows how to make a picture in picture video in the tools you probably already have, what the edit costs in quality, and the cases where it isn’t worth doing at all. None of the methods below needs paid software.
The direct answer
Put the main clip on the bottom track. Add the picture in picture clip on a track above it. Shrink it, drag it into a corner, and export.
Every mainstream editor handles picture in picture overlays the same way, so the skill transfers between them. If you would rather not open an editor at all, a single FFmpeg overlay filter does the same job from a terminal.
The inset is called a picture-in-picture (PiP) overlay. Underneath, it’s just a second video layer with a smaller scale and a fixed position.
What you need before you start
Two clips, plus three decisions worth making before the timeline gets messy. Getting them right first saves a full round of resizing later.
First, decide which clip is the base and which is the inset. The base usually carries the main content and the audio; the inset is the reaction, the webcam, or the second angle. Swapping them later means resizing everything again.
Second, match the two clips’ frame rates. A 30 fps inset on a 60 fps base is fine, but a 29.97 fps inset on a 30 fps base drifts over a long recording and the lip sync slides. Convert the odd one out first.
Third, pick a corner you won’t need. In a screen recording the bottom strip often holds captions or a dock; in gameplay the top-left usually holds a health bar. If the base clip needs re-framing first, crop the frame before you add the overlay, and match the aspect ratio so the inset sits cleanly instead of stretching.
Method 1: Add the overlay in CapCut (free, phone and desktop)
CapCut is the fastest route for most people. It’s free on phones and desktop, and it treats overlays as a first-class feature rather than a hidden menu.
Open a new project and add your main clip to the timeline. Then choose add overlay; on desktop you can drag the second clip straight onto a track above the first. The second clip lands on its own layer.
Drag the picture in picture clip into a corner, then pull a corner handle to resize. Use a corner handle and not an edge handle, or the inset will stretch.
If the inset should sit inside a rounded or circular frame, open the mask tool and pick a shape. CapCut also lets you keyframe the position, which is how a picture in picture inset slides aside when something important appears underneath it. If the base already carries burned-in titles, see how to add text and title overlays without them fighting the inset.
When both tracks look right, export. If the corner clips a caption or the audio lands late, the troubleshooting section below covers both.
Method 2: Add a picture in picture video overlay in iMovie
On a Mac, iMovie has the feature built in, and helpfully it uses the plain name for it. Drop the base clip onto the timeline, then drag the second clip so it sits above the first. A small menu appears with Cutaway, Insert, Picture in Picture, Side by Side, Split Screen and the rest. Choose Picture in Picture from that list.
The picture in picture inset gets its own layer. Drag it to a corner and pull a corner handle to resize; iMovie keeps the original shape. Apple documents this in its official iMovie Picture in Picture guide, which is worth reading once if that overlay menu doesn’t show up.
iMovie’s version is deliberately simple. It has no masks and no keyframed position, so if you need the inset to move or fade, use CapCut or FFmpeg instead.
Method 3: Overlay a clip with FFmpeg
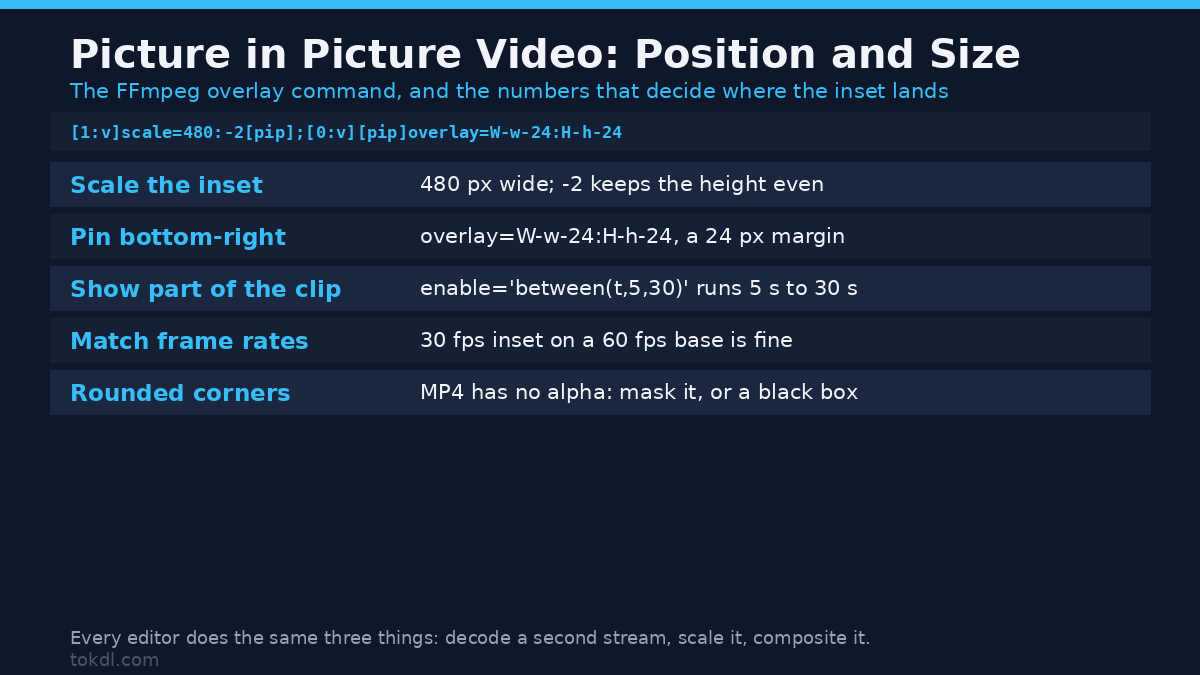
For a repeatable batch job, FFmpeg does it in one pass. This command scales the second input to 480 pixels wide, keeps an even height, and pins it 24 pixels from the bottom-right corner:
ffmpeg -i main.mp4 -i inset.mp4 -filter_complex
"[1:v]scale=480:-2[pip];[0:v][pip]overlay=W-w-24:H-h-24"
-c:v libx264 -crf 20 -preset medium -c:a copy out.mp4
The -2 keeps the scaled height even, which most encoders require. To show the inset only during part of the video, add enable=’between(t,5,30)’ to the overlay filter. The full set of options lives in FFmpeg’s overlay filter documentation.
Notice the -c:a copy flag: the audio is passed through untouched, so this step can’t damage it. The video, on the other hand, is re-encoded from scratch.
What picture-in-picture tools actually do, and their limits
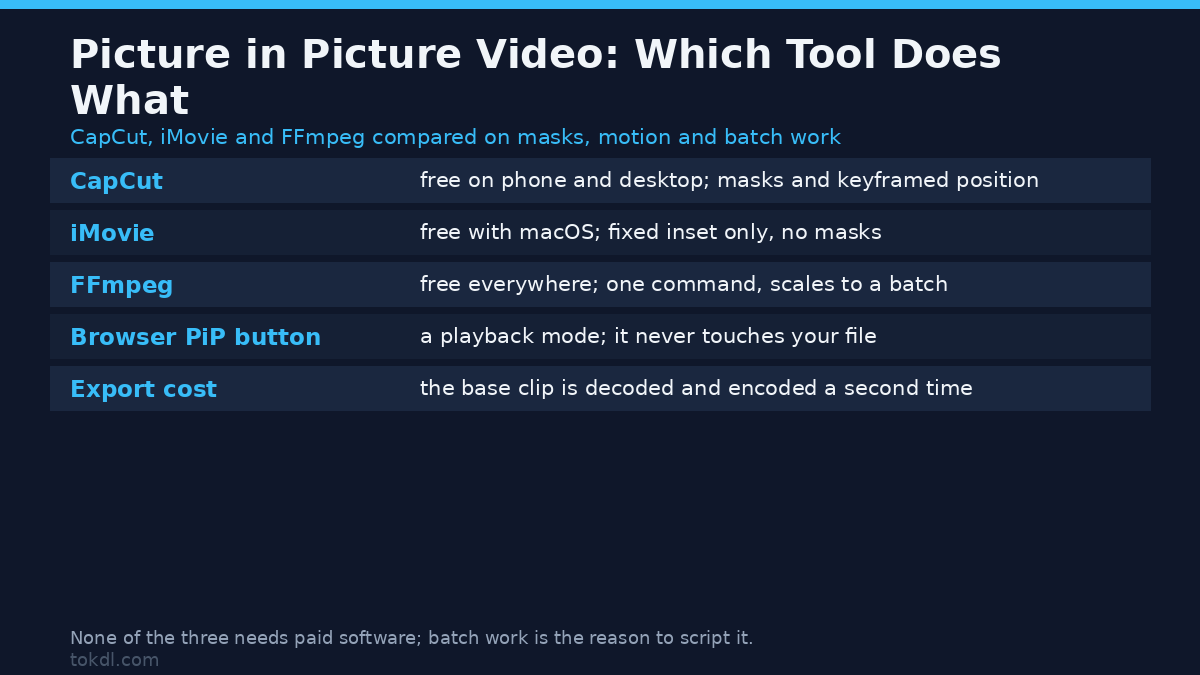
Every tool in this space does the same three things: decode a second stream, scale it, and composite it onto the first at a set of coordinates. That part is a solved problem, which is why a free phone app and a pro editor produce nearly identical overlays.
The differences between picture in picture tools are in the extras. Masks, keyframed motion, drop shadows and green-screen removal are editor features, not part of the overlay itself. Match each one to a tool that does it without a fight.
The limits of picture in picture matter more than the feature lists. A picture in picture overlay forces a re-encode: the base clip is decoded, painted over, and encoded again, so the finished picture is one generation removed from the original. At a sane quality setting the loss is invisible. At the wrong one it isn’t.
Sharp edges rarely need transparency, but rounded or floating insets do. Standard MP4 video carries no alpha channel, so a rounded inset gets a black box behind it unless you apply a mask or export the inset in a format that keeps alpha.
Finally, the browser button isn’t a tool here. The picture-in-picture control inside a web player is a viewing mode. It never touches the file, and some sites disable it outright.
Rights and responsible use
A picture-in-picture overlay is an edit, and an edit doesn’t create rights. If both layers are yours, the result is yours. If the base clip belongs to someone else, adding your face over it doesn’t transfer ownership of anything.
Commentary and reaction formats are common, and in some countries they can fall under fair use or fair dealing. That’s a defence you raise after a complaint, not a permission granted in advance. It doesn’t cover re-uploading another creator’s full video with a small inset on top, and saving a clip grants you no licence to the footage inside it.
Personal, private edits sit in a different place from public uploads and commercial work. Check the terms of whatever platform you publish to before you post; the YouTube Terms of Service apply to anything you upload there.
Troubleshooting
The inset looks stretched or squashed
The two clips have different aspect ratios and the inset was resized from an edge instead of a corner. Undo the resize and pull a corner handle, or scale by width only and let the height follow. If the shapes still don’t match, pad the inset rather than distorting it.
The inset covers a caption or a face
You placed the picture in picture overlay before the base clip’s text was on screen. Move the inset to a quieter corner, or move the caption up. Watching the full clip once at the export size catches most of these before an audience does.
The inset’s audio drifts out of sync
The two clips started at slightly different timestamps, or they run at different frame rates. Nudge the inset on the timeline until the first word lines up, then check the end of the clip as well. In FFmpeg, an -itsoffset before the second input corrects a fixed delay.
Rounded corners show a black box
The inset is a standard MP4, and MP4 carries no transparency. Apply a mask in the editor, or export the inset as a format that keeps an alpha channel and composite that. A black box almost always means the mask was applied to the preview only, not to the export.
The export got slower and the file got bigger
A picture in picture overlay re-encodes the whole timeline, so it takes longer than a trim or a remux. Raise the encoder speed preset, or switch on hardware encoding, and keep the quality setting near where the source already sat. Pushing quality far past the source gained nothing to begin with.
The inset flickers or drops to a black frame
Usually a frame-rate or colour mismatch. An HDR inset over an SDR base, or a variable-frame-rate phone clip on a constant-frame-rate timeline, can flash or stutter. Convert both clips to one frame rate and one colour space before you overlay them.
Frequently asked questions
What is a picture in picture video?
Picture in picture video shows two clips at once, with one shrunk into a corner or edge of the other. The main clip fills the frame and stays the focus; the smaller inset adds a face, a reaction, or a second angle.
Can I add a picture-in-picture overlay for free?
Yes. CapCut is free on phones and desktop, iMovie is included with macOS, and FFmpeg is free everywhere. None of them charges for a basic overlay.
Does the browser’s picture-in-picture button save the overlay into my file?
No. That button is a playback mode. It floats the playing video into a corner of your monitor and leaves the actual file completely untouched.
How do I add picture in picture on iPhone?
Use CapCut or iMovie on the phone. Both let you add a second clip as an overlay, then drag and resize it with your finger.
Will the overlay reduce video quality?
Slightly, and only because the whole file is re-encoded once. At a reasonable quality setting the difference is hard to see; it becomes visible only if you push the quality setting too low or repeat the export several times.
Can I round the corners of the inset clip?
Yes, with a mask. Most editors include rounded and circular mask shapes. Remember that the mask has to be baked into the export, and that MP4 can’t store transparency, so the area outside the mask must be filled with something.
How do I keep the inset in the same corner the whole time?
Place the picture in picture inset once and leave the position alone. Keyframes are only needed when you want the inset to move, scale, or appear partway through the video.
Does picture in picture work alongside subtitles?
Yes, but baked-in subtitles and a picture in picture inset compete for the same space. Move the subtitle line up or shrink the inset so the two never overlap.
Which method should you use?
If you edit on a phone and want it done in a few minutes, use CapCut. If you’re on a Mac and only need a fixed inset, iMovie is built in and needs no install. If you process many files the same way, or script a pipeline, FFmpeg is the only one of the three that scales to a batch.
If you only make a picture in picture video once in a while, the simplest tool wins; batch work is the real reason to reach for the command line. None of the three is the wrong choice. The mistakes come from mismatched frame rates, corners that cover a caption, and exports pushed past the quality the source could support.