
Black and White Video: Convert Color Footage Without Muddy Grays (2026)
Why a desaturated clip looks nothing like film
You shot a scene with a red jacket in it, dropped the saturation to zero, and the jacket turned nearly black. The sky that looked dramatic in color went pale gray. Nothing is broken: a video file stores one brightness channel and two color channels, and the brightness was calculated when the file was encoded, using fixed weights. Desaturation throws the color away and keeps that brightness, so every saturated color keeps only the fraction of its light the weights allow.
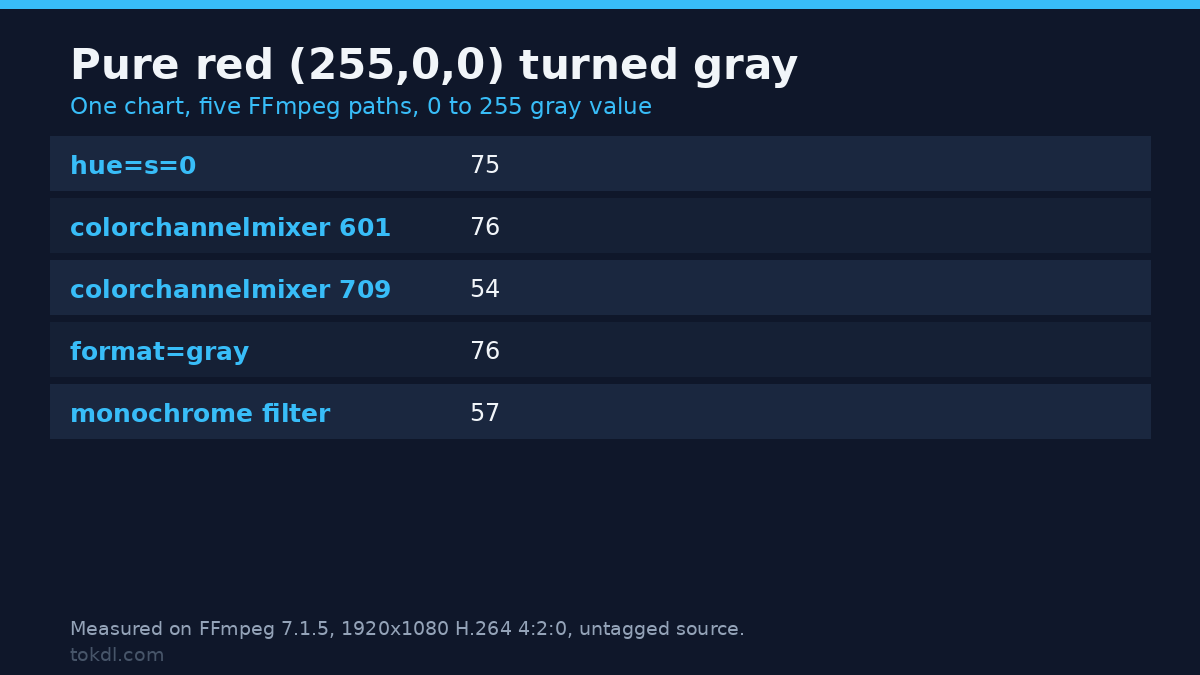
For pure red, that fraction is 21 percent. Red at full strength becomes a dark gray, and if your footage carries a different set of weights, it becomes a different dark gray. I measured five black and white conversion paths on the same color chart, and the same red patch came out anywhere from 54 to 76 on a 0 to 255 scale. That spread is visible on screen, and it’s the difference between a black and white conversion that looks intentional and one that looks flat.
Below: what the weights do, which FFmpeg path to use, how to get contrast back without clipping, and the export settings that stop a black and white gradient from banding. Every number is measured with FFmpeg 7.1.5 against a chart of known RGB patches.
What you’ll learn
- Why
hue=s=0keeps the brightness the encoder already computed. - How to set the luma weights yourself, and what Rec.601 versus Rec.709 does to red and skin.
- Which paths aren’t neutral, and how many gray steps survive an 8-bit export.
What desaturation does to the footage
I built a 1920×1080 chart with ten patches of exact RGB values, encoded it to H.264 4:2:0, and read the pixels back after each conversion. The source carried no color tags, which is common for consumer exports. Here is what the luma plane held and what each path produced:
| Patch (RGB in) | Luma plane | Displayed gray | hue=s=0 | mixer 601 | mixer 709 |
|---|---|---|---|---|---|
| Red (253,0,0) | 81 | 76 | 75 | 76 | 54 |
| Green (0,255,0) | 145 | 150 | 150 | 150 | 182 |
| Blue (0,0,254) | 41 | 29 | 29 | 29 | 18 |
| Magenta (254,0,253) | 106 | 105 | 104 | 105 | 72 |
| Yellow (253,253,0) | 210 | 226 | 225 | 225 | 235 |
| Skin (198,139,109) | 149 | 155 | 154 | 153 | 149 |
| 18% gray | 117 | 117 | 117 | 117 | 117 |
| White / black | 235 / 16 | 255 / 0 | 255 / 0 | 255 / 0 | 254 / 0 |
Two columns matter more than the rest. The luma plane holds 81 for red, and 81 in limited range expands to 76 inside the 16 to 235 code window: (81 - 16) x 255 / 219 = 75.7. And hue=s=0 produced exactly 75. That’s not rounding luck. A frame doesn’t contain a red pixel; it contains a luma code and two chroma codes, and the red only exists after the player rebuilds it. Zero the chroma and the luma code is all that’s left.
So the rule to rely on: desaturation doesn’t convert colors to gray, it reveals the gray that was already there. Every mistake below follows from forgetting it.
Four ways to go black and white in FFmpeg
Method 1: hue=s=0, the honest default
This is the filter I reach for first for black and white, because it changes nothing except the color. Zero saturation leaves the luma plane untouched, so the output matches the brightness your file already had. It’s documented in FFmpeg’s hue filter reference.
ffmpeg -i input.mp4 -vf "hue=s=0" -c:v libx264 -crf 18 -pix_fmt yuv420p -c:a copy black-and-white.mp4Keep the -pix_fmt yuv420p even though the source is already 4:2:0. It costs nothing and it stops a full-range tag from appearing in the output, which I’ll come back to.
Method 2: colorchannelmixer, when you want to choose the weights
The colorchannelmixer does the weighted sum in RGB and gives you every coefficient, so you control the black and white conversion completely. With Rec.709 weights:
ffmpeg -i input.mp4 -vf "colorchannelmixer=.2126:.7152:.0722:0:.2126:.7152:.0722:0:.2126:.7152:.0722:0" -c:v libx264 -crf 18 -pix_fmt yuv420p bw-709.mp4Swap the numbers for .299:.587:.114 and you get Rec.601 weights. On the chart that one change moved red from 54 to 76 and green from 182 to 150, shifts of 22 and 32 levels. Skin landed at 149 either way, because skin sits close to the neutral axis where both weight sets agree.
Method 3: format=gray, fast but tagged full range
format=gray asks the scaler to do the conversion. It uses the same 601 weights as hue=s=0 on an untagged source, so the grays match, but it also changed the range tag on my output: the delivered file came back as yuvj420p with color_range=pc, a full-range black and white file, when the source was limited. Players handle that inconsistently. Adding -pix_fmt yuv420p put the tag back.
ffmpeg -i input.mp4 -vf "hue=s=0,format=yuv420p" -c:v libx264 -crf 18 bw-gray.mp4Method 4: black and white paths that aren’t neutral
Two options look like shortcuts and aren’t. eq=saturation=0 zeroes the chroma planes to 127 rather than the neutral 128, and that one-code offset left a visible tint on the chart: the red patch decoded to (73,75,72). On a wide sky it reads as a slight green cast. Use eq for contrast and brightness, not for desaturation.
The monochrome filter is a chroma-spot filter built for hand-tinted looks, and its output is darker: red came out at 57 rather than 75, green at 116 rather than 150. That’s a look, not a black and white conversion.
Why the tag decides how your black and white looks
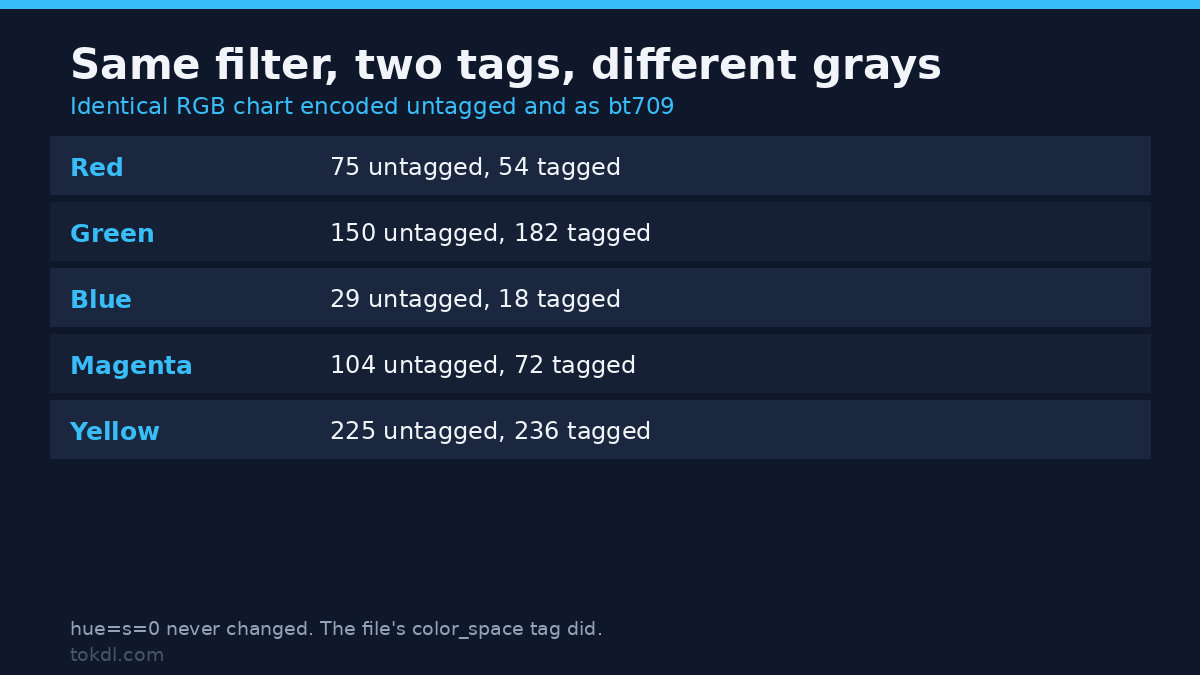
Here’s the part that surprised me. I encoded the identical RGB chart twice: once with no color tags, once with -colorspace bt709 -color_primaries bt709 -color_trc bt709. Then I ran the same hue=s=0 filter on both.
| Patch | Untagged (601 weights) | Tagged bt709 | Difference |
|---|---|---|---|
| Red | 75 | 54 | -21 |
| Green | 150 | 182 | +32 |
| Blue | 29 | 18 | -11 |
| Magenta | 104 | 72 | -32 |
| Yellow | 225 | 236 | +11 |
| Skin | 154 | 150 | -4 |
The filter didn’t change. The file did. An untagged export got 601 weights, a tagged one got 709, so the same black and white command produced a 21-level difference on red. That’s why two clips from one shoot can desaturate differently: one carries a BT.709 tag, the other nothing at all. Check first:
ffprobe -v error -select_streams v:0 -show_entries stream=pix_fmt,color_range,color_space -of default=nw=1 input.mp4If color_space reads unknown, you’re in the 601 branch. For HD footage from a modern camera, 709 is the correct set, so either tag the source or use the 709 numbers.
Getting contrast back in black and white without clipping
Desaturated footage looks flat for a second reason: mid-tones that were separated by hue now sit at similar brightness. An 18 percent gray patch measured 117 before the grade and 82 after a moderate curve, a drop of 35 levels. What you don’t want is the highlights collapsing with them.
ffmpeg -i input.mp4 -vf "hue=s=0,curves=all=0/0 0.25/0.14 1/1" -c:v libx264 -crf 18 -pix_fmt yuv420p bw-graded.mp4That curve pulls the quarter point down to 0.14 and leaves the endpoints pinned, so it can’t clip them. Measured on the chart, none of the eight non-extreme patches clipped.
Watch the gradient, though. A smooth ramp held 220 distinct gray values before the curve and 175 after it, in an 8-bit file. Those 45 missing steps are where banding starts, and it shows first in skies and soft backgrounds. If you grade heavily, expect to see it, and read the vignette guide before you add edge darkening on top.
Adding grain and a tint to black and white
Black and white exposes noise and grain that color was hiding, because the chroma planes carried a lot of it. Add grain after the conversion, not before. The guide to adding film grain to video has the strength settings; the rule that matters here is order: desaturate, grade, then grain.
For a warm tint, a sepia matrix is three rows of weights. Measured on the same chart, white came back at (255,255,238), 18 percent gray at (158,141,109), and skin at (206,182,142):
ffmpeg -i input.mp4 -vf "colorchannelmixer=.393:.769:.189:0:.349:.686:.168:0:.272:.534:.131:0" -c:v libx264 -crf 18 -pix_fmt yuv420p bw-sepia.mp4The blue row sums to 0.937, not 1.0, which is why pure white loses 17 levels of blue and gains its warmth. A tint is a set of numbers you can check.
Export settings that keep black and white clean
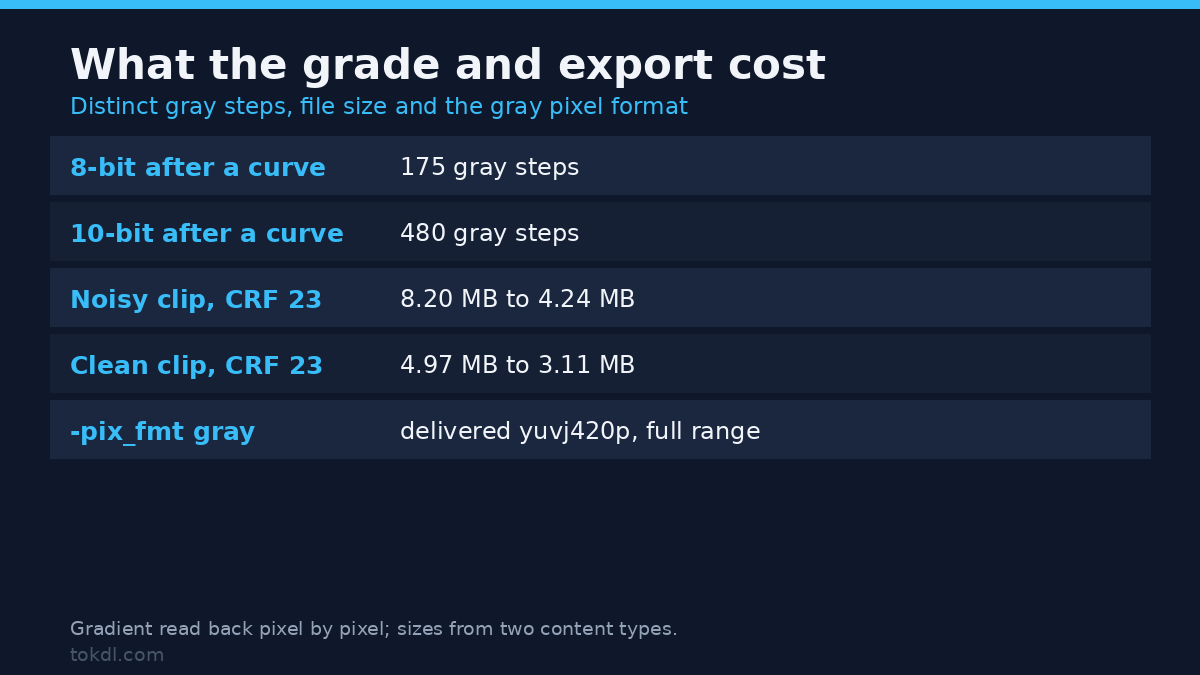
-pix_fmt gray looks like the obvious choice, and on this build it doesn’t work the way the name suggests. I asked for gray through libx264 three times, into MP4, MKV and NUT, and every file came back as yuvj420p with color_range=pc. The flag was accepted, no warning appeared, and the delivered file was full-range 4:2:0 rather than 8-bit gray. FFV1 kept it and wrote a real gray stream.
In practice you don’t need a gray-only stream, because the chroma planes of a desaturated file are flat and cost almost nothing. What you need is bit depth, if the grade is heavy, as covered in 8-bit versus 10-bit video:
ffmpeg -i input.mp4 -vf "hue=s=0,format=yuv420p10le" -c:v libx264 -crf 18 -pix_fmt yuv420p10le bw10.mp4Same curve, same source, delivered two ways: 175 distinct gray values at 8-bit, 480 at 10-bit. When the source itself was encoded at 10-bit, the same grade held 596. The extra steps aren’t new detail out of an 8-bit file, but they stop a player from showing hard bands when it stretches the gradient across a big screen.
| Setting | What I measured |
|---|---|
| Size, noisy 1080p30 at CRF 23 | 8.20 MB color, 4.24 MB black and white (-48%) |
| Size, clean motion at CRF 23 | 4.97 MB color, 3.11 MB black and white (-37%) |
| Grey steps after a curve | 175 at 8-bit, 480 at 10-bit |
| -pix_fmt gray via libx264 | yuvj420p, full range, no warning |
| color_space on an untagged export | unknown, which the scaler reads as 601 |
The size saving varies with content: chroma noise is expensive, so a grainy clip saves more than a clean one.
Common mistakes
- Grading contrast before switching to black and white. You grade colors that are about to disappear.
- Assuming the file has a matrix tag. An untagged export gets 601 weights, and your reds land 21 levels lighter than in the tagged version of the same shot.
- Using
eq=saturation=0for a clean conversion. It leaves chroma at 127 and a cast on wide, flat areas. - Treating
-pix_fmt grayas a promise. Probe the delivered file; mine came back full-range 4:2:0 three times out of three. - Pushing a curve until highlights merge. Pin both endpoints, then check the gradient for banding.
- Adding grain before the conversion. Chroma noise averages away and luma noise gets crushed by the curve.
FAQ
Can I get the color back after converting? If you kept the original, yes. If you only kept the export, no: the chroma planes are gone and no filter rebuilds them.
Why does my black and white footage look brown on one screen? It’s the display profile, not the file. A neutral gray can render warm on a TV with a warm preset, so sample a patch you know is neutral first.
Should I use 10-bit? If you grade contrast, yes. The same curve held 480 gray steps at 10-bit against 175 at 8-bit. If you only desaturate, 8-bit is fine and smaller.
Does desaturating make the file smaller? Yes, by 37 to 48 percent in my tests at CRF 23, because flat chroma planes cost almost nothing.
What about the monochrome filter? It works, but it’s a look. Its output was 18 levels darker on red and 34 darker on green than a neutral black and white conversion.
Conclusion
Black and white conversion is one filter and one decision. The filter is hue=s=0, and the decision is whether the weights your file already carries are the ones you want. Check the tag, convert, grade contrast with pinned endpoints, then export at a bit depth that survives the curve. If you’d rather fix the color first, the guide to color correcting a video covers white balance and exposure, and the piece on a washed-out export explains the range tag.