
Pixelated Video: Why It Happens and How to Fix It (2026)
You export the clip, everything looks sharp, and then the file lands on a phone or a streaming page and the sky turns into a grid of squares. The damage happened at export; the player only made it visible.
I re-encoded the same 60-frame clip more than twenty times to find out which settings move the blockiness and which ones only move the file size. A pixelated video is usually one of three defects, and two can’t be repaired after the encode.
Why a pixelated video is three defects, not one
The word covers anything rough, and the three causes need opposite fixes.
Macroblocking is the grid. H.264 and H.265 divide every frame into 16×16 pixel blocks and transform each one separately. When the encoder runs out of budget, it coarsens the quantization step and a block collapses toward one flat tone, which is what makes a pixelated video look like a grid. You see it in skies and shadows first, because smooth gradients give the eye nothing else to look at.
Upscaling isn’t a grid at all, but people call it pixelated anyway. A 640×360 source blown up to 1920×1080 has 9 times fewer real pixels than the frame claims, and no bitrate invents the missing ones. It looks soft, then blocky once the scaler’s interpolation gets compressed, and that’s the second flavour of pixelated video. Front cameras and screen recordings are the usual sources.
Banding is a third defect blamed on the phrase pixelated video: smooth steps in a gradient with no block edges. It comes from 8-bit rounding rather than the bit budget, and the debanding guide covers it.
Bits per pixel: the number behind most pixelated video
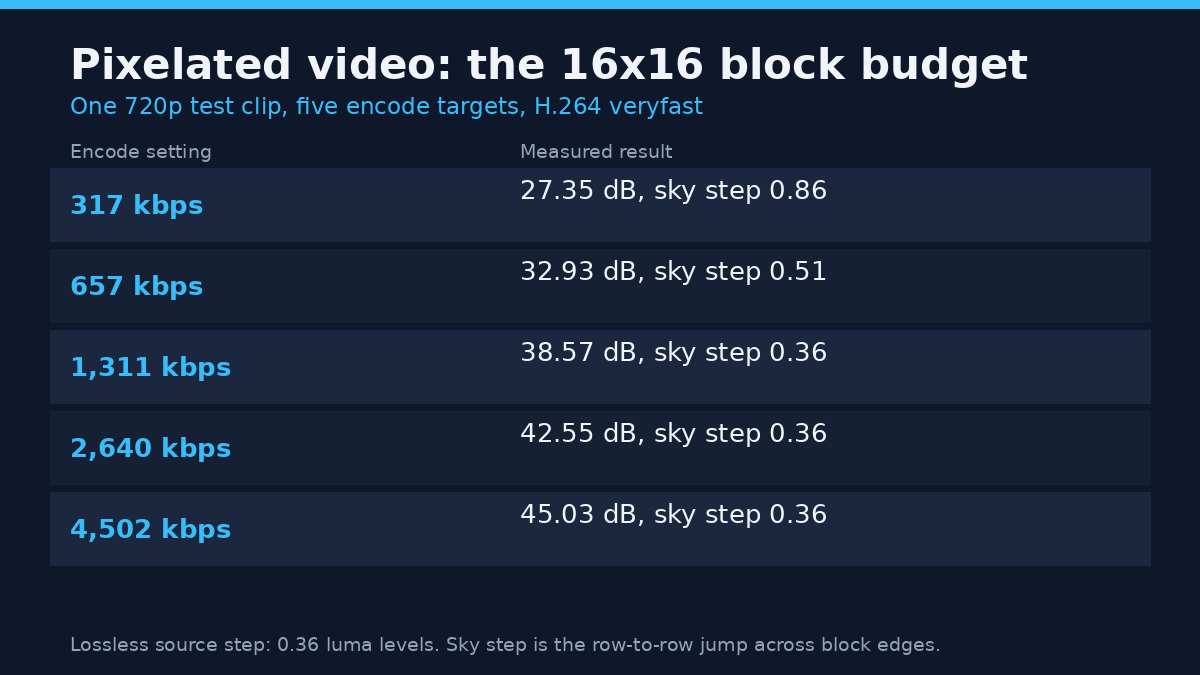
Bitrate alone says nothing about whether a pixelated video is likely, because 5 Mbps at 720p and 5 Mbps at 4K aren’t the same offer. The useful number is bits per pixel: bitrate divided by width x height x frame rate. My clip at 1280×720 and 15 fps carries 13.8 million pixels per second, so 317 kbps works out to 0.023 bits per pixel. That’s starvation.
| Target | Delivered | Bits per pixel | PSNR | SSIM | Block step in the sky |
|---|---|---|---|---|---|
| 400k | 317 kbps | 0.023 | 27.35 dB | 0.856 | 0.86 levels |
| 800k | 657 kbps | 0.048 | 32.93 dB | 0.962 | 0.51 levels |
| 1500k | 1,311 kbps | 0.095 | 38.57 dB | 0.987 | 0.36 levels |
| 3000k | 2,640 kbps | 0.191 | 42.55 dB | 0.994 | 0.36 levels |
| 6000k | 4,502 kbps | 0.326 | 45.03 dB | 0.996 | 0.36 levels |
That’s libx264 at preset veryfast with a 2 second keyframe interval, measured against a lossless FFV1 encode. The last column is the one that matters for a pixelated video. I measured the average row-to-row jump in the smooth sky, split by whether a row sits on a 16-pixel block boundary or inside a block. The lossless source reads 0.36 levels, since an 8-bit gradient steps every few rows anyway. At 317 kbps the boundary jump more than doubles to 0.86 levels, which is the grid you see.
Across the whole frame the average gradient ratio barely moved, from 1.03 to 1.05, even on the worst encode. Texture hides the blocks; the sky doesn’t. Judge from a busy frame and a pixelated video can look fine to you and terrible to the client.
Fix 1: give the encoder a real budget
With CRF the encoder spends bits where the picture needs them and you pick a quality level instead of a number. On this clip, CRF 18 delivered 2,990 kbps at 44.33 dB, CRF 23 delivered 1,618 kbps at 40.20 dB, CRF 28 delivered 902 kbps at 36.29 dB, and CRF 32 collapsed to 595 kbps at 33.16 dB. That last step is where gradients start to look pixelated, at the quality of the 800k row above.
ffmpeg -y -i input.mp4 -c:v libx264 -crf 20 -preset slow -pix_fmt yuv420p output.mp4
ffprobe -v error -select_streams v:0 -show_entries stream=width,height,bit_rate -of default=nw=1 input.mp4
Run the second command before you touch the first. A small width and height mean bitrate isn’t your problem; a healthy resolution under 0.04 bits per pixel means the budget is too low. Keep the -y: without it, ffmpeg refuses to overwrite an old file and still exits 0, so a rerun can look successful while the previous export sits there. Constant quality also beats a target when the content changes shot by shot; the CRF versus average bitrate comparison and the bitrate calculation walkthrough cover both cases, and the libx264 options page defines -crf and -preset.
Fix 2: match the bitrate to the resolution
Doubling the resolution quadruples the pixels, so the same bitrate gives a quarter of the bits per pixel. A clip that looks clean at 1080p shows blocking at 4K with an unchanged bitrate, which is the most common way a routine upgrade creates a pixelated video. YouTube’s upload guidance is a useful check: 5 Mbps at 720p, 8 Mbps at 1080p, 35 to 45 Mbps at 4K. Those numbers assume a harder source and a re-encode, but they rise with resolution instead of staying flat.
For 30 fps, treat 0.05 bits per pixel as the floor for detailed footage and 0.10 as comfortable, about 3 and 6 Mbps at 1080p. A talking head on a plain wall survives the floor; confetti, water and foliage need the top end. If you’re still choosing a frame size, the resolution comparison covers when extra pixels earn their budget, and a smaller frame is often the cheapest fix for a pixelated video.
Fix 3: never scale a small source up
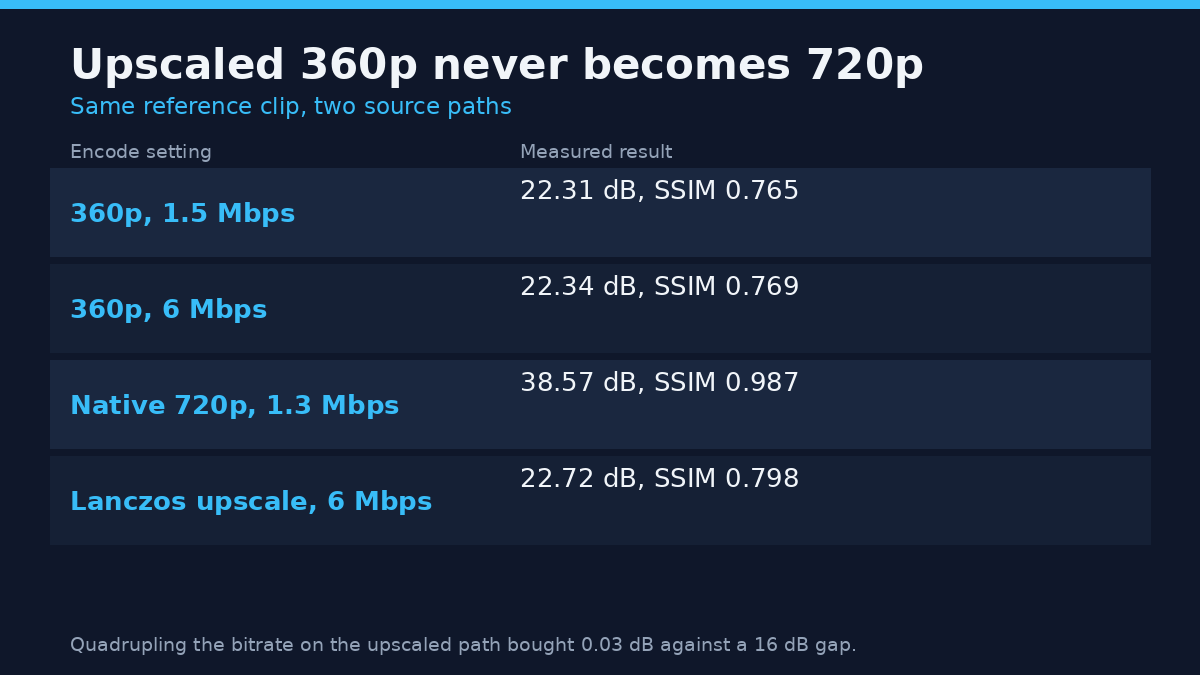
This fix saves the most time, because it’s a decision, not a setting. I downscaled the 720p frames to 640×360, brought them back with two scalers and two bitrate targets, and compared every result against the original.
| Source path | Delivered | PSNR | SSIM |
|---|---|---|---|
| 360p upscaled, bilinear, 1.5M target | 1,159 kbps | 22.31 dB | 0.765 |
| 360p upscaled, bilinear, 6M target | 4,798 kbps | 22.34 dB | 0.769 |
| 360p upscaled, lanczos, 1.5M target | 1,143 kbps | 22.69 dB | 0.793 |
| 360p upscaled, lanczos, 6M target | 4,922 kbps | 22.72 dB | 0.798 |
| Native 720p, 1.5M target | 1,311 kbps | 38.57 dB | 0.987 |
Quadrupling the bitrate on the upscaled path bought 0.03 dB, which is the clearest sign that a pixelated video from a small source can’t be re-encoded away. The gap to the native encode is more than 16 dB, because the information was gone before the encoder started. Lanczos beats bilinear by 0.4 dB, small next to what the wrong source costs. If nothing better exists, pick the scaler:
ffmpeg -y -i input.mp4 -vf scale=1920:1080:flags=lanczos -c:v libx264 -crf 20 -pix_fmt yuv420p output.mp4
That’s the best upscale available, and it still won’t look like real 1080p. Deliver at the source’s own resolution, or shoot again. Downscaling is the direction that gains quality.
Fix 4: a short keyframe interval isn’t a quality dial
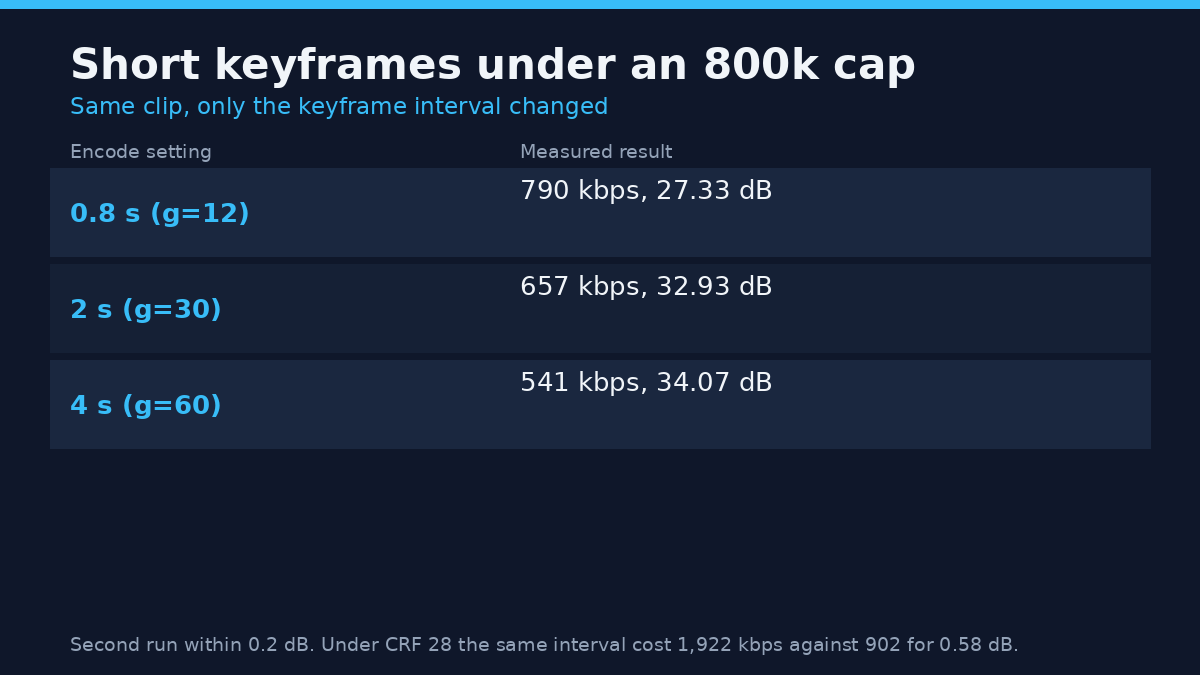
Many guides repeat the advice to shorten the GOP, and under a bitrate cap it makes a pixelated video worse. I held the 800k target and changed only the keyframe interval. One keyframe every 0.8 seconds delivered 790 kbps at 27.33 dB. At 2 seconds it delivered 657 kbps at 32.93 dB, and at 4 seconds 541 kbps at 34.07 dB. I ran every case twice; the second pass gave 786 kbps at 27.21 dB, 666 kbps at 32.95 dB and 536 kbps at 34.00 dB.
| Keyframe interval | Capped at 800k | PSNR | CRF 28 | PSNR |
|---|---|---|---|---|
| 0.8 s (g=12) | 790 kbps | 27.33 dB | 1,922 kbps | 36.87 dB |
| 2 s (g=30) | 657 kbps | 32.93 dB | 902 kbps | 36.29 dB |
| 4 s (g=60) | 541 kbps | 34.07 dB | 567 kbps | 36.05 dB |
Under a hard cap, frequent keyframes eat the budget and starve the frames between them, which cost 5.5 dB. Under CRF there’s no cap to starve, so the same interval just costs more bits: 1,922 kbps against 902 for 0.58 dB. Short keyframes serve seeking, not quality. Two seconds at 30 fps, so -g 60, is a sane default. YouTube asks for a closed GOP of half the frame rate with unlimited variable bitrate, so its advice avoids that case.
Fix 5: grain is expensive, so treat it first
Noise is the worst case for a block-based codec, because random per-pixel detail can’t be predicted from the previous frame. I added grain to the same clip and encoded it against its own lossless reference. A 3M target delivered 2,278 kbps and managed SSIM 0.763. A 6M target delivered 4,698 kbps and reached 0.797 against a reference that ran at 112 Mbps. The grain never fully survives, and the encoder spends most of the budget trying.
Part of that gap is grain being smoothed away, which many viewers prefer. The cost sits elsewhere: bits spent chasing noise are bits not spent on the picture underneath, so grain turns into a pixelated video sooner than clean footage does at the same bitrate. If the grain isn’t essential, a light denoise buys back more than another megabit. Run hqdn3d=4:3:6:4.5 in a -vf chain and compare one frame at 100% zoom. On clean charts I measured no benefit, since nothing was there to remove.
Why “my PSNR is fine” doesn’t mean the picture is clean
When I disabled the in-loop deblocking filter at 657 kbps, PSNR barely moved: 32.95 dB against 32.93 dB. The block boundary jump in the sky rose from 0.51 to 0.57 luma levels, though. A whole-frame metric averaged over texture can’t see a defect that lives in smooth areas, which is where a pixelated video shows. Judge on a gradient at 100% zoom, and use metrics only to compare two encodes of the same content.
A six-point checklist for a pixelated video
- Probe the source with
ffprobebefore changing any encoder setting. - Compute bits per pixel. Under 0.04 is where blocking starts on detailed footage.
- Re-encode from the original, not an earlier export. Every generation adds blocks.
- Use CRF for a file you’ll keep, a bitrate target only when a platform demands one.
- Keep keyframes near 2 seconds unless a format needs otherwise.
- Check a gradient frame at 100% zoom, not a busy one.
Common mistakes
Raising the bitrate on a 480p source is the big one, and the most common misdiagnosis of a pixelated video. The file grows, the blocks soften, but resolution doesn’t come back and the 16 dB gap doesn’t shrink.
Exporting at 4K from a 1080p timeline is the second: 4 times the pixels to fill, so bits per pixel fall by three quarters. The third is judging from the editor’s preview, which often plays a proxy. Play the export in another player at 100%.
FAQ
Does a higher bitrate fix a pixelated video?
Only if the source still holds the detail. My 720p clip went from 27.35 dB at 317 kbps to 45.03 dB at 4,502 kbps. The upscaled 360p version sat at 22.3 dB at both 1.5 and 6 Mbps, because the pixels were never in the file.
What bitrate do I need for 1080p?
Around 3 Mbps for a simple scene and 6 to 8 Mbps for detailed footage at 30 fps, which is 0.05 to 0.13 bits per pixel. YouTube recommends 8 Mbps for 1080p at 30 fps, a reasonable master target.
Why does my video look pixelated after uploading?
The platform re-encodes your file for each playback quality, so a clean master can still arrive blocky on a slow connection. A pixelated video after upload is usually the platform’s encode, not yours. Upload at or above the recommended bitrate and compare one timestamp at 720p and 1080p first.
Can I fix a pixelated video I already exported?
If it’s blocking from a low bitrate, yes, re-encode from the original. If it’s upscaling, no, and each pass makes the blocks harder to remove.
The short version
Diagnose before you re-encode. Probe the source, compute bits per pixel, and decide whether you’re looking at blocks from a starved encoder or softness from a small source, because only the first responds to settings. Give detailed footage 0.05 to 0.10 bits per pixel, use CRF when you can, keep keyframes near 2 seconds, and check a gradient frame at full zoom. A pixelated video usually comes from the export you already made, and the next one only helps if the input or the budget changes.