
How to Speed Up a Video: Cut a Clip Down Without Losing the Sound
A twelve minute screen recording where the useful part lasts ninety seconds. A drone clip that has to fit a fifteen second Reel. A lecture you want to review on the walk home. All three end in the same place. You need to speed up a video, and the first tool you reach for either wrecks the sound or drops half the frames.
I’ve retimed plenty of clips, usually the night before a deadline, and the part that catches people out isn’t the speed change itself. It’s the three things attached to it. The pitch of the audio, the frame rate of the result, and the file size that refused to shrink the way you expected. Learning how to speed up a video is mostly about those three, because the retiming button is the easy part.
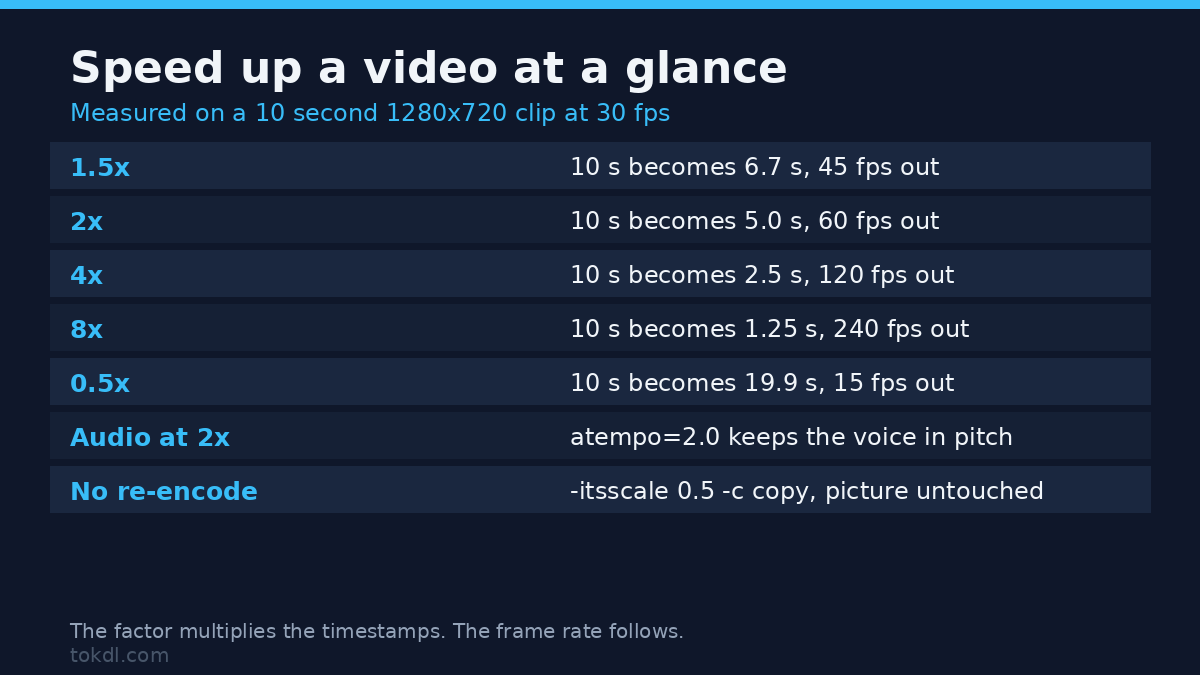
Every number below comes from a 10 second test clip at 1280×720 and 30 fps, so the lengths and frame rates are measured rather than estimated.
What you’ll take away
- What 2x, 4x and 8x do to the length of a clip, and to its frame rate.
- FFmpeg commands that speed up a video with the audio in sync and in pitch.
- The one filter flag that stops a retimed clip from starting with a stall.
- How to speed up a video without re-encoding the picture at all.
- The file size arithmetic, so you can predict the result before you speed up a video.
Speed up a video: the factors in one table
Every tool, from FFmpeg to CapCut, does the same thing underneath. It multiplies the presentation timestamps of the frames by a number, and that number sets the length, the frame rate and the audio work left over.
| Speed | FFmpeg video filter | A 4:00 clip becomes | Frame rate from a 30 fps source |
|---|---|---|---|
| 1.5x | setpts=0.667*PTS | 2:40 | 45 fps |
| 2x | setpts=0.5*PTS | 2:00 | 60 fps |
| 4x | setpts=0.25*PTS | 1:00 | 120 fps |
| 8x | setpts=0.125*PTS | 0:30 | 240 fps |
| 0.5x (slower) | setpts=2*PTS | 8:00 | 15 fps |
The output frame rate is the column people skip, and it explains a jerky result better than anything else. Speeding footage up doesn’t create frames, it packs the frames in hand into less time. A 30 fps source therefore comes out of a 2x retime carrying 60 frames per second. That’s why a 4x clip looks fine in a player and stutters when you speed up a video and deliver it at 30 fps.
What a speed change does to the file size
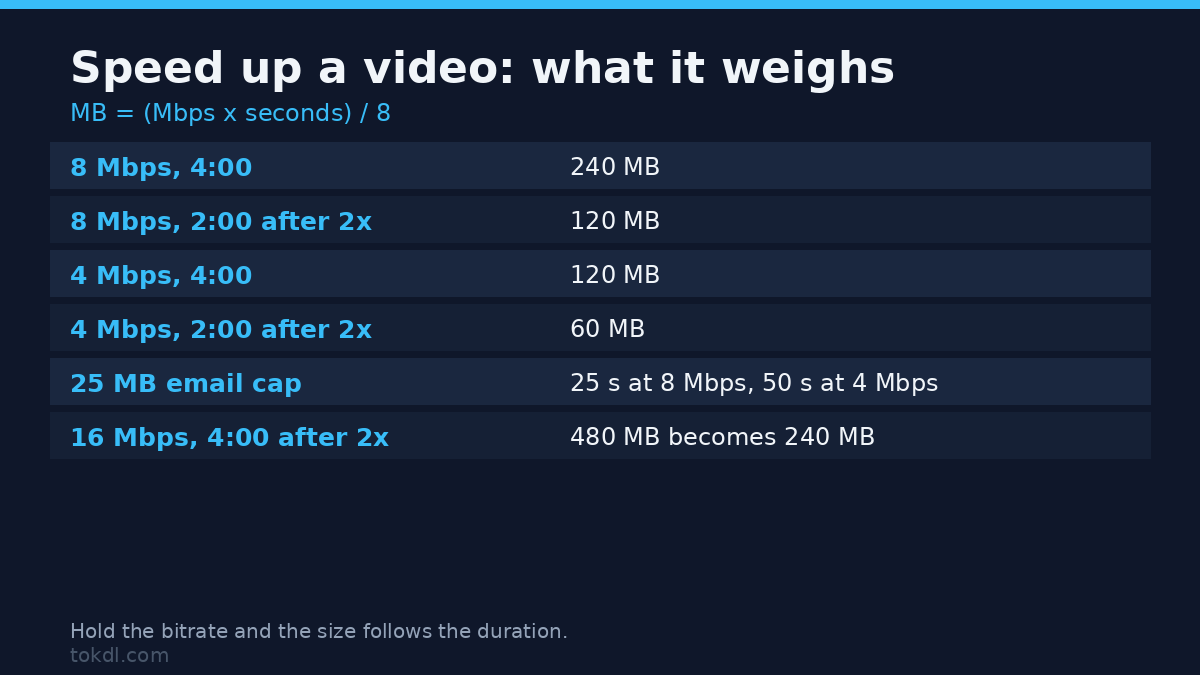
The arithmetic is short. Take the bitrate in megabits per second, multiply by the seconds, divide by eight:
MB = (Mbps x seconds) / 8
Four minutes is 240 seconds, so a 1080p clip at 8 Mbps weighs about 240 MB. When you speed up a video the payload shrinks with the duration, so the same clip at 2x lands near 120 MB. Drop the bitrate as well and the saving compounds. Those four minutes at 4 Mbps come to roughly 120 MB, and 2x takes it to about 60 MB.
That matters when something downstream has a limit. A 25 MB cap on an email attachment holds 25 seconds of 8 Mbps video, or 50 seconds if you re-export at 4 Mbps. A speed change plus a sensible bitrate gets a long clip through a door it wouldn’t fit through before. If the bitrate still feels like guesswork, the bitrate calculation walkthrough works the same formula from the other direction, and the compression guide covers what you lose when you push it.
One honest caveat. Halving the duration only halves the file if you hold the bitrate steady with a flag like -b:v. Export at a fixed quality setting instead, which is what -crf does, and the encoder spends roughly the same bits on every frame, so the saving lands near half rather than on it.
How to speed up a video with FFmpeg
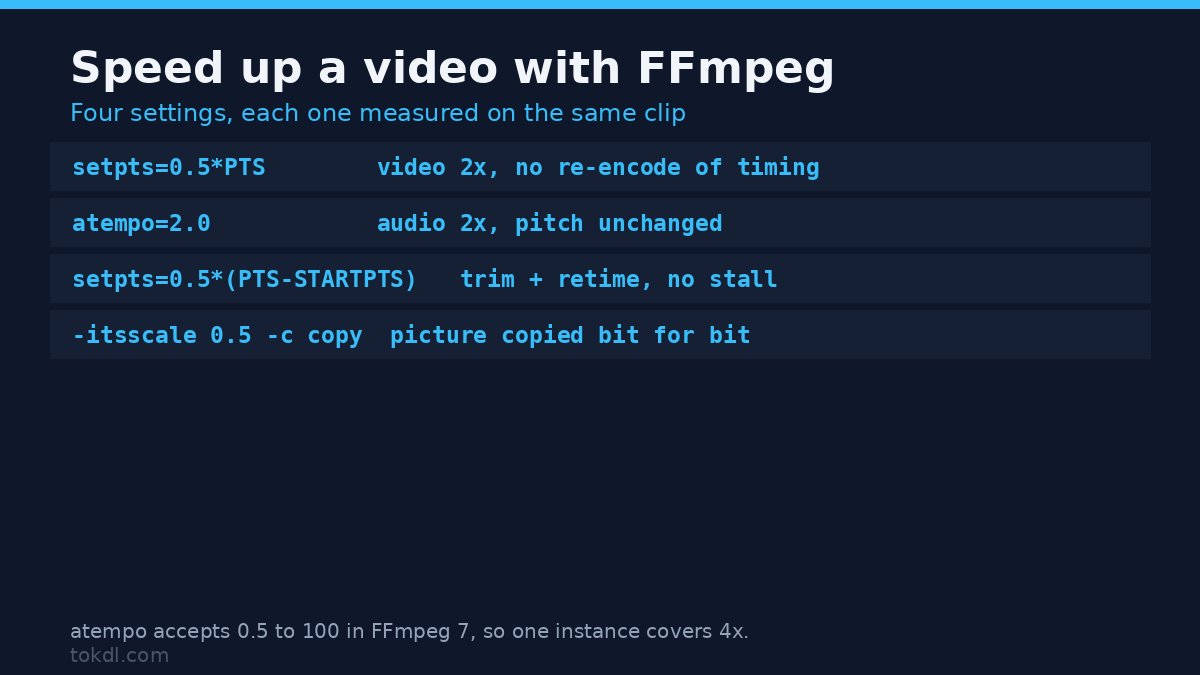
Four commands cover almost every case. Run them in a terminal and swap the filenames for yours.
Step 1: change the speed, drop the audio
ffmpeg -i input.mp4 -filter:v "setpts=0.5*PTS" -an output.mp4The filter multiplies every timestamp by 0.5, so a 10 second clip comes out at 5 seconds. It touches the picture only. Leave the audio alone and it keeps its original length, so the sound runs past the end of the video and gets cut off mid-sentence. Dropping it with -an is the honest default when the sound doesn’t matter.
Step 2: keep the audio, keep the pitch
ffmpeg -i input.mp4 -filter_complex "[0:v]setpts=0.5*PTS[v];[0:a]atempo=2.0[a]" -map "[v]" -map "[a]" -movflags +faststart output.mp4atempo is the audio half of the job when you speed up a video. It changes playback rate without moving the pitch, so a voice keeps its register and a music bed stays in key. The filter accepts values from 0.5 to 100, which is worth knowing because plenty of older guides describe a 0.5 to 2 limit and tell you to chain two instances for 4x. On FFmpeg 7 a single atempo=4.0 does it, and atempo=2.0,atempo=2.0 gives the same result on an older build.
-movflags +faststart matters for anything headed for a web page. It moves the index to the front of the file so a browser can start playing before the download finishes. The everyday FFmpeg command list carries the same flag on the other jobs I run through this tool.
Step 3: speed up a video and trim it in one pass
ffmpeg -i input.mp4 -ss 00:00:30 -t 20 -filter_complex "[0:v]setpts=0.5*(PTS-STARTPTS)[v];[0:a]atempo=2.0[a]" -map "[v]" -map "[a]" -movflags +faststart output.mp4That command lifts 20 seconds from the 30 second mark and hands you a 10 second file. The extra (PTS-STARTPTS) is the part worth stealing. Without it the retimed clip inherits the offset of the seek point, so the container reports a longer duration than the file holds and some players sit on a black frame before the picture starts. Subtracting the starting timestamp puts the first frame back at zero. I hit this on my test clip, and the fix brought a 4 second cut to exactly 2.011 seconds at a start time of 0.000.
Keep -ss and -t after the input. The older habit of putting -ss ahead of -i for a faster seek changes how the timestamps reach the filter, and you get a file longer than the sum you asked for.
Step 4: speed up a video without re-encoding the picture
ffmpeg -itsscale 0.5 -i input.mp4 -c copy output.mp4This one is the shortcut most people have never met. A speed change is a change to timestamps, so FFmpeg can rescale them and copy the video stream untouched. On my test clip the video stream came out bit for bit identical to the source, confirmed by comparing the stream hashes, and a 10 second file became a 5 second one. Nothing was re-encoded, so there’s no quality loss at all.
Two limits decide whether it’s usable. The audio is copied too, so it plays fast and high, like a tape running quick, because the audio timestamps were rescaled along with everything else. And not every player handles a scaled stream politely. Use it when the clip is silent, or when you speed up a video and want the fastest possible retime with zero loss.
How to speed up a video in the editor you already use
When you speed up a video by eye, the GUI route is quicker, and every editor hides the same timestamp multiplication behind a slider.
- CapCut: select the clip, open the Speed panel, then pick a preset multiplier or open the curve editor when the change should ramp.
- Premiere Pro: right click the clip and choose Speed/Duration for a single value, or press R and drag the clip edges to remap speed over time.
- DaVinci Resolve: right click the clip, choose Change Clip Speed, then tick the ripple box if the timeline should close the gap.
- iMovie: select the clip, click the Speed button above the viewer, then pick Fast or Slow. Apple documents the flow in its iMovie speed guide.
Two settings deserve a look before you export from any of them. Most editors preserve pitch by default and will let you switch that off, and most let you set the project frame rate. If the retimed clip is joining a project running at 30 fps, decide whether you’re exporting the 60 fps result or letting the editor drop frames.
Browser editors handle short clips fine. Where they sting is the free tier, which often caps export length or adds a mark to the picture. For a two minute social clip that’s an acceptable trade. For anything longer, the command line is quicker once you’ve run it twice.
How to speed up a video without changing the pitch
Pitch is the reason a sped up voice sounds like a cartoon, and it’s the most common complaint I get about retimed clips. Resampling audio to play faster raises its frequency, which raises the voice. setpts doesn’t touch audio at all, while asetrate does exactly that:
ffmpeg -i input.mp4 -filter_complex "[0:a]asetrate=48000*2,aresample=48000[a]" -map 0:v -map "[a]" output.mp4That line doubles the tempo by pretending the samples were recorded at twice the rate, and it doubles the pitch with them. It’s the wrong tool for a retime unless you want the chipmunk effect on purpose. atempo is the right one, because it stretches the waveform in time while holding its frequency in place. Voices stay recognisable and music stays in tune.
The same logic applies when you slow a clip down. Playing at half speed without touching the audio leaves sound that ends at the halfway mark, so most editors mute the clip or stretch the sound instead. If the audio should survive a slowdown, the filter is atempo=0.5.
Mistakes that make a retimed clip look wrong
Reaching for -r instead of setpts. Setting an output frame rate doesn’t change speed at all, it only resamples how many frames per second get written. A 4x clip forced to -r 30 on my test rig kept its 2.5 second length and fell to 76 frames, so the motion stuttered wherever the encoder threw frames away.
Re-encoding twice. If you speed up a video and then trim it in a second pass, the picture gets compressed twice and detail goes with it. Trim first, then retime, or do both in one command.
Assuming the file will halve. Duration is half of the size equation, not all of it. Speed up a video at a fixed quality setting and it saves roughly what you’d expect. Do it at a fixed bitrate and it saves exactly what the formula says.
Expecting smooth slow motion from a normal source. Slowing a 30 fps clip to 0.5x gave me a 20 second file whose frame rate fell to 15 fps, because there were half as many frames to spread across twice the time. Good slow motion needs a source shot at a high frame rate or interpolation you have to ask for. The frame rate comparison explains why 60 fps footage slows down so much better.
Retiming before the cut. Speeding up a whole 40 minute recording and then hunting for the good 90 seconds costs an encode of the whole file. Trim to the section first. The trim walkthrough covers the cut on every platform, and that step belongs before this one.
Questions I get about speeding up a video
Does it hurt quality to speed up a video? Not by itself. Retiming changes timing, and the only quality cost comes from re-encoding, which any edit requires. The exception is the no-re-encode route with -itsscale, which copies the picture untouched.
How far can I speed up a video before it looks bad? It depends on the source frame rate, not the tool. At 30 fps, 2x leaves you 60 frames per second of material, which stays smooth. At 4x you’re at 120 fps and a normal player will drop most of those frames, so the result reads as fast but less fluid.
Can I speed up a video in a browser without installing anything? Yes, for short clips. Free browser editors retime a clip in a few clicks, and their limits show up as export caps or a mark on the picture rather than failures. Check the clip length against the free tier first, because that’s where the wall usually sits.
Why does my retimed clip pause at the start? Nearly always the timestamp offset that follows a seek. Add (PTS-STARTPTS) to the filter and the first frame returns to zero.
How to speed up a video: the short version
Retiming is one multiplication. Pick the factor, keep the audio in pitch with atempo, subtract the starting timestamp when you cut and retime in a single command, and remember that the file shrinks in proportion to the duration when the bitrate holds. For silent footage, the copy route saves an entire re-encode.
The rest is judgement about the source. Footage shot at 60 fps retimes beautifully, and footage shot at 24 fps starts to jump past 3x, so the best moment to think about speeding a clip up is while you’re shooting it.