
How to Trim a Video: Cut Unwanted Parts on Any Device (2026 Guide)
The best part of your video sits between minute two and minute three. The rest is a slow zoom into a carpet, a cough, and forty seconds of someone asking whether the camera is still rolling. Every clip carries dead weight, and most people send the whole thing anyway because cutting it feels like a job for editing software.
It is not. Every current phone, Windows PC, and Mac ships with a trimmer, and learning how to trim a video is a one-time five-minute task. This guide shows the built-in tools on each platform, when a command-line cutter is the better choice, and what to do when the result comes out wrong.
The short answer
Open the clip in the editor that already came with your device and drag two handles. Windows has Clipchamp, Mac has QuickTime Player, iPhone and iPad have Photos, and Android has Google Photos.
All of them cut the start or end of a clip in under a minute, and most can remove a middle section too. Save as a new file and the original stays untouched.
What to prepare before you trim
Keep the original file. A trim writes a new clip, and the editor usually asks whether to save a copy or replace the source. Choose the copy option the first few times, because a replaced original cannot be un-trimmed. One wrong drag and the keeper footage is gone.
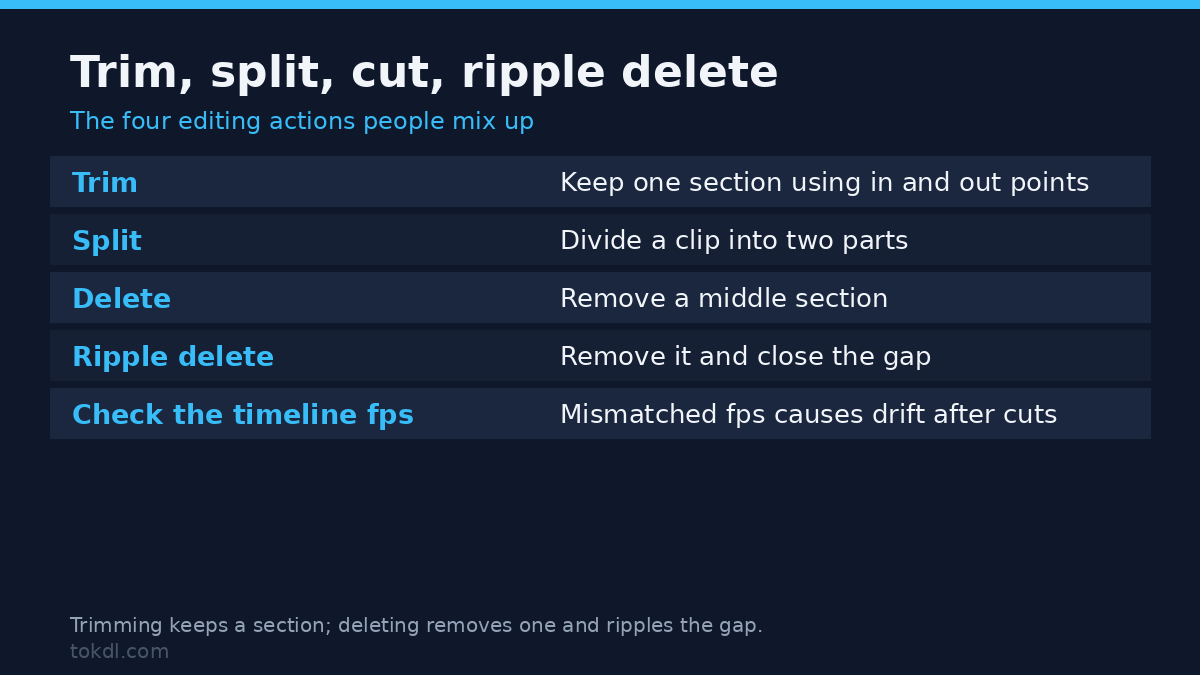
Know the difference between trimming and cutting. Trimming removes time from the start or the end. Cutting splits the video so you can delete a middle segment, which is what you need when the mistake is in the center of the clip. Most built-in editors do both, but the buttons live in different places, so check the tool once before you need it.
If the footage came from recording your screen, the capture step matters more than the trim. A clean recording with the right area selected trims faster than one that needs heavy cutting.
Method 1: How to trim a video on Windows and Mac with built-in tools
Trim on Windows with Clipchamp
Clipchamp is preinstalled on Windows 11 and free to download on Windows 10. Open it from the Start menu and sign in with a free Microsoft account. Create a new video, import your clip, and drag it onto the timeline at the bottom of the screen.
Select the clip on the timeline and drag the white handles at either end inward to the frames where you want the cut. To remove a middle section, move the playhead to the start of the bad part, use the split tool, then split again at the end and delete the piece between the splits.
Press Export and choose 1080p to save an MP4. The buttons are documented on Clipchamp’s official site if your version looks different.
Trim on Mac with QuickTime Player
QuickTime Player is the default video app on macOS, and its trim tool has not moved in years. Double-click the clip to open it, then press Command+T or choose Edit, Trim from the menu. A yellow bar with two handles appears along the bottom of the window.
Drag the handles to the frames you want to keep and press Trim. If you want to keep the original untouched, duplicate the file first, then trim the copy and save it with a new name. QuickTime writes the shortened movie in place, so the source file is replaced unless you saved a copy beforehand.
Method 2: How to trim a video on a phone with the apps that came with it
If your clip lives on a phone, the steps barely change from one platform to the next: open the file in the default gallery app, tap Edit, and drag the handles on the timeline. No download, no account, no watermark.
Trim on iPhone and iPad with Photos
Open the video in Photos and tap Edit. The timeline at the bottom shows the clip with white handles on both ends. Drag them to the frames where the clip should start and end, then tap Done.
Photos offers two choices: Save Video keeps the trimmed length in place of the original, and Save Video as New Clip keeps both versions. The second option is the safer default.
Trim on Android with Google Photos
Open the video in Google Photos and tap the Edit pencil. The bottom panel shows a trim slider with two handles and a playhead between them. Drag the handles to the section you want, tap the checkmark, and choose Save copy so the original stays in your library. Most Samsung and other gallery apps offer the same pattern, even when the buttons have different labels.
What trimming tools actually do, and their limits
Trimming is the cheapest edit in video, because the tool keeps the original frames and only changes where playback starts and stops. Editors that “save a copy” often re-encode the file anyway, which is why the exported clip can look a hair softer than the source. The lossless alternative is a stream copy, which copies the video data without re-encoding and runs in seconds even on long files.
The command-line tool that does this best is ffmpeg, a free open-source program that runs on Windows, Mac, and Linux. A stream-copy trim looks like this:
ffmpeg -i input.mp4 -ss 00:01:00 -to 00:02:30 -c copy output.mp4The flags mean: take the file input.mp4, start at one minute, stop at two minutes and thirty seconds, copy the streams without re-encoding, and write output.mp4. The catch is accuracy. A stream copy cuts on the nearest video keyframe, so the first frame may land a few frames early or late.
Remove the “-c copy” part and ffmpeg re-encodes the section, which is slower but lands on the exact frame you asked for. The full flag reference lives at the ffmpeg project.
Online trimmers sit in the same category and share the same limits. A browser-based trimmer uploads your clip to its server, so a long or private video becomes someone else’s file while it processes, and free tiers cap length and file size or stamp a watermark on the export.
They are fine for a short clip you do not mind sharing; they are the wrong tool for anything sensitive. The built-in editors above avoid the upload entirely because the whole job happens on your device.
Rights and responsible use
A trimmed video is still someone’s content, and the cut does not change who owns it. Trimming your own recording, your own upload, or footage you were given permission to edit is straightforward. Trimming a clip you saved from a platform does not give you the right to republish it, sell it, or present it as your own work.
Keep edited clips for personal reference and you are on safe ground. Sharing or commercial use is a different matter, and every platform sets its own rules for what members may do with downloaded material. Saving or cutting something grants no rights to it, as YouTube’s Terms of Service make clear for the largest video library on the internet.
Troubleshooting common trimming problems
The trimmed file is almost as big as the original
The editor kept the original bitrate, which is normal for a stream copy and for many built-in editors. Trimming shortens the duration but does not shrink the data rate. If the size matters more than the seconds you removed, re-encode at a lower bitrate or run the result through a compression pass, and our guide to compressing video without losing quality shows the settings that keep it watchable.
The cut lands a few frames early or late
Stream copies cut on keyframes, and keyframes do not sit at every frame. Switch to a re-encode in the same tool, or add a few frames of padding and trim again in the editor’s preview. Frame-perfect cuts belong to editors that decode the video, not to quick copy commands.
The app will not open my file
The video is probably in a container or codec the editor does not read, which happens often with MKV files and phone recordings. Convert it to a common format first; the steps for converting it to MP4 usually solve the import error before you ever touch a trim handle.
The export has no audio
The split removed the audio track along with the video segment, or the editor mapped the tracks incorrectly. Undo the split, check that the audio track spans the whole timeline, and export again. If the file came from a source with multiple audio tracks, pick the right one in the editor’s audio settings before cutting.
I trimmed the wrong part and saved over the original
That is why the copy option exists, and it is the one failure no editor can undo. If the original is gone, check the platform’s trash or your device’s recently deleted folder. The version that remains is the version you trimmed, and the removed seconds are not recoverable from the file itself.
My phone saved the video but it is still the full length
You likely tapped Save Video instead of Save Video as New Clip, or the gallery kept playing the cached original. Open the file again and confirm the duration in the info panel. On iPhone, choose Save Video as New Clip to keep both lengths; on Android, use Save copy and check that the new file shows the shorter time.
Frequently asked questions
How to trim a video without losing quality?
Use a stream copy so the video data is never re-encoded. ffmpeg with the -c copy flag does this in seconds, and QuickTime’s trim on Mac is close behind. Re-encoding editors can soften the image slightly, though the change is often invisible at normal playback sizes.
Can I cut the middle out of a video?
Yes, with a split or cut tool. Split the clip at the start of the section you want to remove, split again at the end, and delete the segment between the splits. Clipchamp, iMovie, and most phone editors expose this as a scissors or split button on the timeline.
Does trimming remove the audio?
No. A trim keeps every track that falls inside the new start and end points. Only a separate mute or audio-delete action removes the sound. If your trimmed export comes out silent, the editor mapped the audio track out of range, and re-exporting from the original fixes it.
Is there a free way to trim video online?
Browser-based trimmers exist and work for small clips, but they upload your file to a server, cap length and size on free plans, and often watermark the result. For a private clip the built-in editor on your device is the better free option, because nothing leaves your machine.
Why does my trimmed export look softer than the source?
The editor re-encoded the video and applied its default bitrate, which is lower than the source’s. Raise the export quality setting, or trim with a stream copy that keeps the original data. The difference is most visible in fast motion and fine detail like text or grass.
Can I undo a trim after I saved it?
Only if you kept the original or the editor saved a backup. Once a trim replaces the source file, the removed frames are gone from that file. Save copies as you work, and you will never need to recover a clip from a recycle bin again.
Which method should you use?
Match the tool to where the clip lives and how precise the cut needs to be. A quick pass on a phone video belongs in Photos or Google Photos. A desktop clip in Clipchamp or QuickTime needs no install and no upload. A frame-accurate cut, a batch of files, or a lossless trim is ffmpeg territory, and the one-line command above is enough for most people.
| Where the clip is | Built-in tool | Best for |
|---|---|---|
| Windows | Clipchamp | Timeline splits, exports to MP4 |
| Mac | QuickTime Player | Fast start-and-end trims |
| iPhone and iPad | Photos | Trims without leaving the gallery |
| Android | Google Photos | Trims with a saved original |
| Any device | ffmpeg | Lossless and frame-accurate cuts |
Start with the tool you already have, because it handles nine out of ten clips. The command line is for the tenth clip, the one with an exact frame requirement or a folder full of files. You now know how to trim a video on every device you own, and the original file stays safe as long as you keep saving copies instead of replacing sources.
[…] check the small jobs first. If you only need to shorten one clip rather than combine several, trimming a video is a simpler task. If the real problem is that the finished file won’t fit an upload cap, […]
[…] of obscuring them, and it costs nothing extra. If you only need part of the clip, you can also trim the clip first so there is less footage to […]
[…] instead, so the original tracks survive, then re-add the chapter file if the markers shifted. The trimming guide shows the stream copy […]
[…] the theatrical cut through arithmetic, so trim or pad the video to match the cue sheet instead. The trimming guide covers that […]
[…] hand trimming is faster. Our guide to splitting a video into parts covers the manual route, and trimming a video handles the single cut. When there are ten gaps or more, use a command that can remove silence for […]
[…] you only want the middle of a long take flipped, trim the clip first, apply Reverse to the trimmed section, and place it back between the parts you left […]